Understanding Blue Meander
This post is an explanation of the process behind Automeander.
In March I visited the de Young Museum and saw a print called Blue Meander that I fell in love with. There were three other pieces from the same Meander series on display there, but I was drawn to Blue Meander because it seemed that the printing process was much more visible. I sketched a small bit of it into my notebook, and decided to try generating new Meander pieces when I found some time. To do that, though, I’d have to dissect the pieces to figure out their rules.
The Process
The first step, figuring out the printing process, was easy. The exhibit that Blue Meander was in was focused on screenprinting, and the museum had a step-by-step printing guide beside the pieces.

Every entry in the Meander series is made of two screens: a background screen, and a design screen. The complex patterns are made entirely by the positioning of the design screen each time it’s used to print a layer.
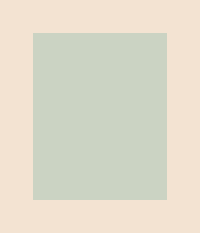
First, the background screen is used to lay down a solid block of color. There are three more passes after this first one, and they’ll all align themselves inside this rectangle.
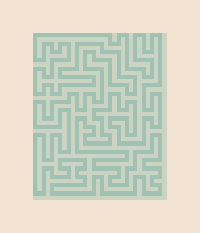
The design screen is used to lay down a pattern that’s aligned with the top left corner of the previous background block. The design is slightly smaller than the background, so there’s some extra space at the bottom and right after this first pass.
The design screen is used again, but this time aligned with the bottom right corner of the background block. The ink in this pass seems a little lighter than the previous pass, but notes from Anni Albers say that it should actually be the same color. At this point that you can see that the offset of the two layers is exactly one grid unit, both vertically and horizontally.
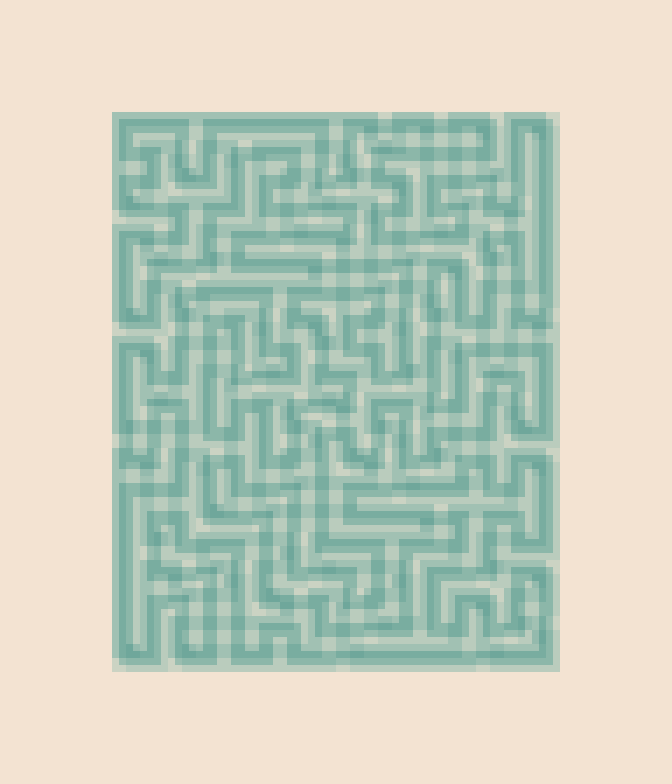
The image above looks pretty bad at small sizes, so please take a look at a full-size version
For the final pass, the design screen is rotated 180 degrees and is offset equally from the top-left and bottom-right corners. Generally the ink for this pass is noticeably more vivid than the previous passes, but that’s not the case in Blue Meander.
The Design Screen
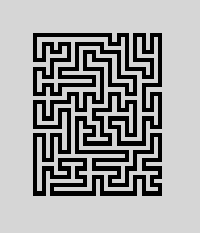
Although the printing process was clearly written out in steps, the design screen itself was still a mystery. If I wanted to generate Meander pieces, I had to understand the general rules of the pattern. As a first step, I copied a photo of the piece into Photoshop and just painted over the top layer of lines so that I could focus on the design screen.
I stumbled into a few theories before finding something that seemed to match the design. Maze structures and space filling curves both seemed like good initial leads, and they did help me find the real0 answer: the meander line can be represented as a Hamiltonian cycle on a rectangular grid graph.
A grid graph is a grid of nodes. And in the case of the Meander pieces, they’re arranged in a rectangle.

A Hamiltonian curve is a line that visits every node in a graph exactly once. A Hamiltonian cycle visits every node, and also ends at the place that it started.

As far as I can tell, these designs were made by Anni Albers entirely by hand. I tried a couple times to do that myself, hoping to figure out a way to easily make these patterns. No luck. Instead I’d hoped that someone else had solved this problem already and I could just use their approach.
I found one paper, An Algorithm for Finding Hamiltonian Cycles in Grid Graphs Without Holes by Christopher Umans, and that title made it seem like that would be the end of it. After reading about 30 pages and skimming through the next 30 something I kind of gave up. The part that I did read mentioned a different technique, sliding, that didn’t satisy the paper’s objective. I decided to try implementing it anyway since it could be summarized in less than 70 pages.
After implementing it and trying it out, any potential defects in the algorithm seemed invisible. Regardless of the rigor of the algorithm, it makes designs that are interesting enough, and that’s all I really needed it to do.
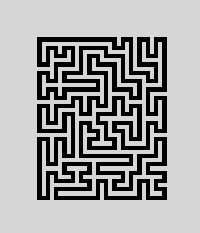
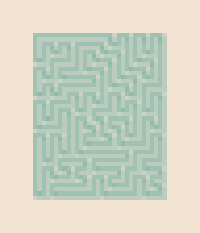
You can take a look at some of the generated pieces here:
Revisiting process
It felt a little incomplete to stop the process here. I was pretty proud that I was able to replicate these pieces, but I thought I could take it a step further. While reading through The Prints of Anni Albers, I learned that a significant part of her process was incorporating moments of serendipity: papers falling on top of a screen, mistakes during the printing process, and others. Especially moments where the technology of printmaking spoke to her. All throughout the process of writing this program, I was keeping an eye out for those moments.
Loren Schmidt introduced me to the notion of “making friends with bugs”. If there were ever a moment in programming where the technology “spoke to you”, it’d be through bugs. Rather than immediately fix them, I saved them in a specific place. What was wrong with the code? What was the visual impact? After making a record of it, I fixed it, and continued on. Once I had the image generation working, I slowly reintroduced the bugs back into the program, and recorded the result.
After spending some time with the bugged pieces, I’ve come to like them far more than my Meander pieces. Even though these pieces feel a bit more my own, they still have a sort of mystery that made me appreciate Anni Albers’s pieces.
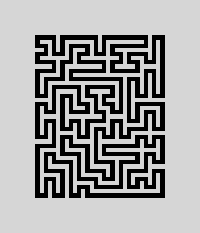
You can take a look at some of the bugged pieces here:
0 Only a few pieces match Hamiltonian Cycles. The others have small deviations to fit the grid size (odd number of nodes) that was selected.